Black And White Photography In The Digital Age
We live in a digital age, surrounded by colour, and bombarded by images every day. It is estimated that 90 million images are uploaded to Instagram alone every single day, the vast majority in colour.
Why is it then that black and white photography continues to hold such power and fascination for photographers and those who view images? In this short article, I will discuss the power of black and white photography and offer some tips and techniques that will help you to improve your images in both black and white and colour.
It’s probably fair to say that, for those of us at a certain age, black and white photographs invoke a sense of nostalgia. They hark back to the golden age of photography when the masters like Ansel Adams were producing work that most of us can only aspire to.
The reality, however, is much more complex than simple nostalgia.
How we see light in photographs
When we look at an image our eyes interpret and decode a number of factors. We are drawn to the brightest parts of the image first, then to the areas of greatest contrast, and then to the sharpest parts.
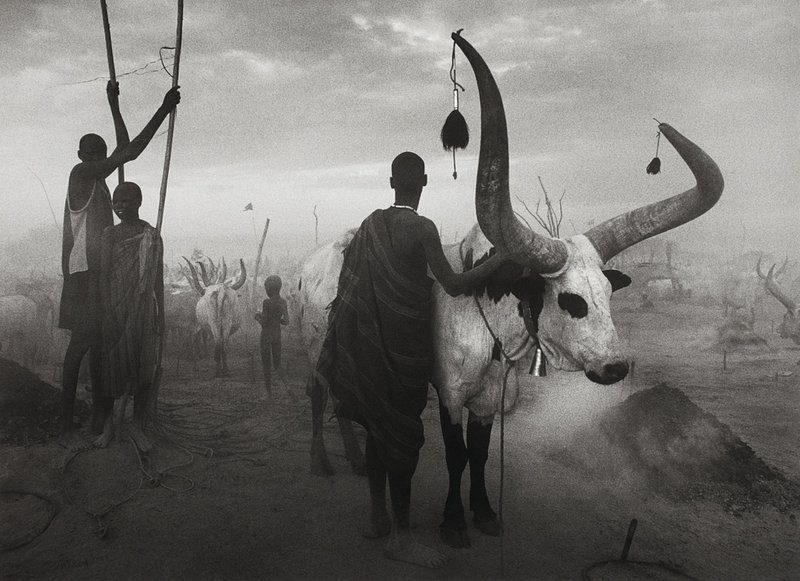
We then follow lines that lead our eyes around the image. You can clearly see how these rules are apparent in this image by the great Sebastiao Salgado.
The white of the animal’s head is the brightest part of the image and it contrasts sharply with the man standing beside it. The animal’s horns and face are very sharp and serve to frame the man.
The pile of dirt on the right of the picture leads the eye to the main subjects whilst the gap between the main subjects and the people to the left of the photograph leads the eye to the child and animals in the background.
There is another element that is present in much of Salgado’s work, something that I term the hierarchy of light.
The hierarchy of light in photography
This image and the one above demonstrate exactly what I mean about the hierarchy of light.
Without wishing to get into theoretical models the basic premise is that hard light will always overpower soft light which will overpower diffused light.
White light will always overpower coloured light, but that isn’t relevant when we are discussing black and white photography.
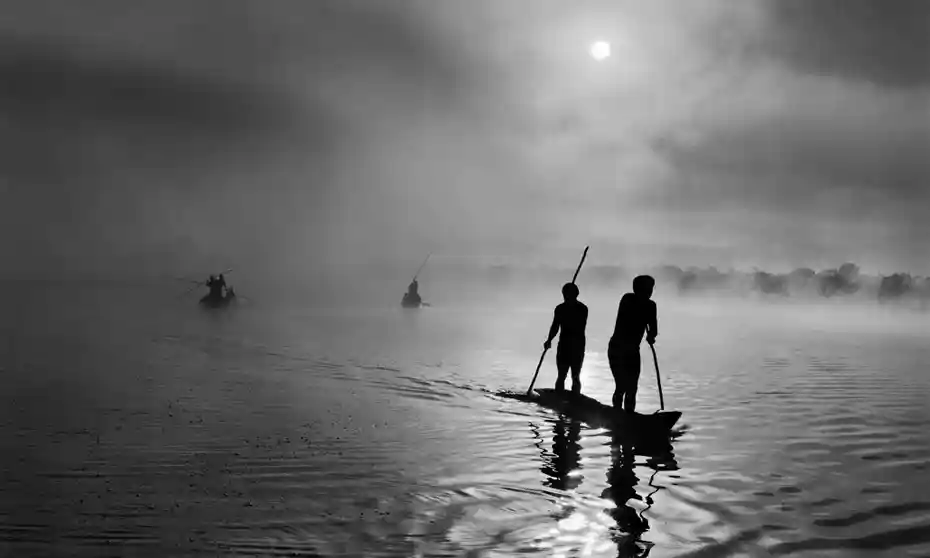
In each of these images, it is clear to see that all three types of light are present. The sun provides hard light which is softened and diffused by dust clouds or mist. The light is also used to direct the eye to where the photographer wishes to direct the viewers eye.
Employing these lighting techniques in your own digital photography you can make images that are more compelling for the viewer.
Whilst the lighting is a key element in Salgado’s images it is the absence of color that makes the images even more powerful.
There are many reasons for this, but put simply, the absence of color reduces the amount of information that the eye and the brain have to interpret. The creative photographer can use this knowledge to focus the viewer on what they want the viewer to focus on.
The trick is seeing in black and white
The trick to creating great black and white photography is learning to see in black and white. You must learn to view the world as seen through your camera in terms of implied color, and through gradations of grey.
A black and white image shows a range from absolute black to pure white through the whole spectrum of grey tones. This range is obscured by the wider range of colour and tonality in colour photographs and the contrast is therefore softened.
Take this seascape by Ansel Adams, arguably the greatest exponent of landscape photography in history.
The contrast between black and white is extreme. Notice the the sharp lines created by the black rocks against the light background whites and grey’s created by the sea and, in particular, by the crashing waves and by the water glistening on the surface of the rocks.
That level of contrast is not present in colour images because the colour softens the effect.
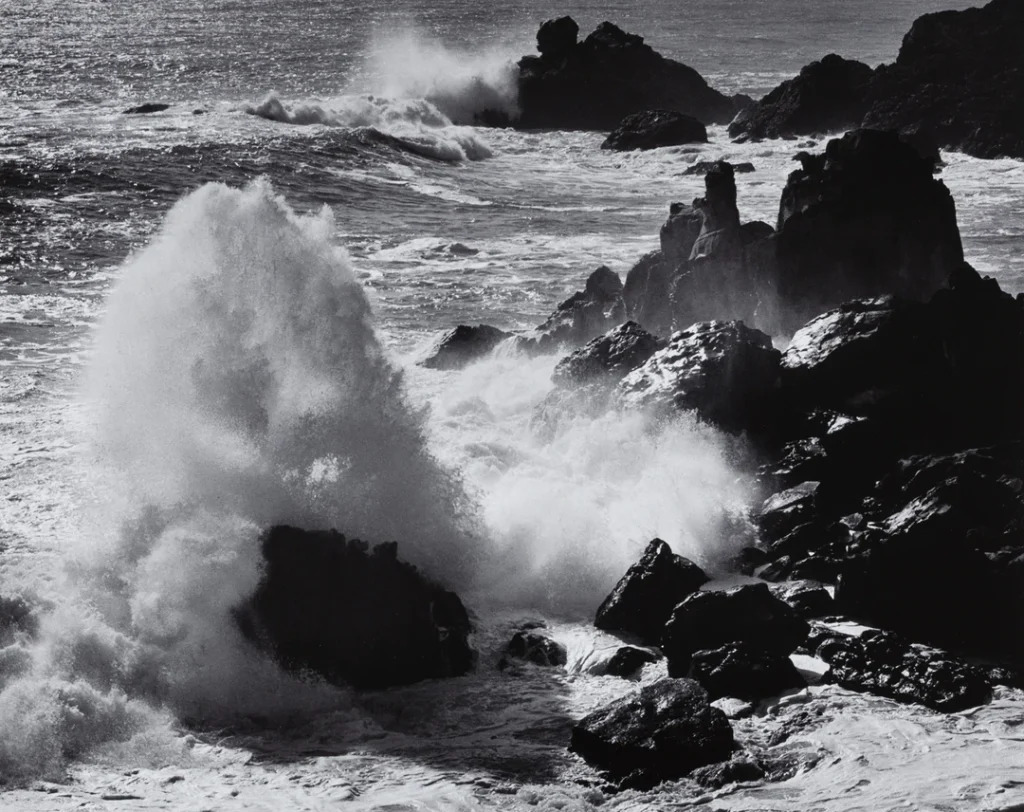
Analysing Adams’ image reveals a number of photography tips that can be used by the black and white photographer to add a dynamic quality to our photos.
- Position the camera to emphasise the edges or the delineation between light and dark
- Use lighting (natural or artificial) to maximise contrast
- In post processing adjust the levels of light and dark areas to increase contrast further without losing all of the detail.
- Use post-processing to maximise the tonal range and to emphasise the areas most important to the composition
- Avoid landscapes where the primary emphasis is on saturated colour.
- Seek landscapes or seascapes where there are varied textures and shapes
- Look for drama in the interplay between light and dark, especially if there are strong edges
- Use positive and negative spaces to highlight and reinforce the composition
When I began to think more about the use of light to create more interesting photographs, one tip really helped me to begin seeing in black and white.
I highly recommend shooting your images in RAW format with your camera set to its monotone mode. Of course the colour will be there when you come to process your work, but what you will see on the back of the camera will be in black and white. This will help you to see the light and contrast levels much more clearly.
I find this helpful, even when I know that the final image will be in colour.
Another tip I recommend is to edit your image in black and white when you are dodging and burning. The removal of colour during this post-processing stage helps to avoid the eye being confused by colour. I simply add a black and white layer at the top of the layer stack. This layer can be deleted when you are happy with the light levels.
I highly recommend completing this step before working on colour grading or adjustment.
Composition for beautiful black and white photography
Successful black and white photography places a greater emphasis on composition. The absence of colour to guide or misdirect the eye makes formal composition and framing even more important.
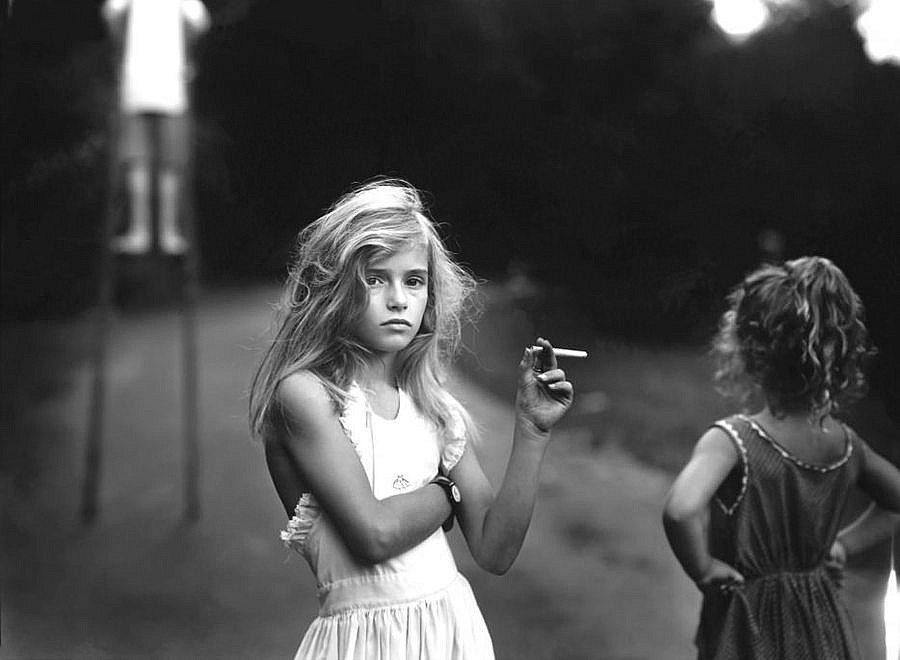
Consider this image by Sally Mann. It is easy to see how Mann has used the techniques of lighting and contrast to lead the eye. But in this image composition and framing is even more important.
Note how the main subject is front and centre, brightly lit, and contrasting brightly against the dark background. Note how the position of the smaller child invites our eye to travel to the candy cigarette held by the main subject.
The curve of the path, the shape of the main subjects arms, and the smaller child’s gaze and body lead us to the secondary point of focus and the purpose of the photograph. The use of shape, lines, patterns and asymmetry all aid us to interpret the image.
It’s also interesting how the heights of the foreground subjects lead us to the stilt walker in the background, something that provides an additional point of interest that the eye discovers as it explores the image.
It is the combination of all these various elements that add such power to this photograph. Understanding how the image has been constructed opens a window to the development of similar techniques helping us to add drama to our own creative black and white photography.
Monochrome Portrait Photography
W Eugene Smith’s 1948 monochrome portrait of writer Tennessee Williams illustrates how contrast in a low-key photograph helps to make a really striking portrait. The background is underexposed (typically by around two stops of light) to highlight the outline of Williams’ face.
Low-key portraits are effective because they add a sense of mystery to the scene. In an effective low-key portrait, such as this, one area is lit to create the contrast and hence the drama. In this example the outline of Williams’ face is the area of highest contrast.
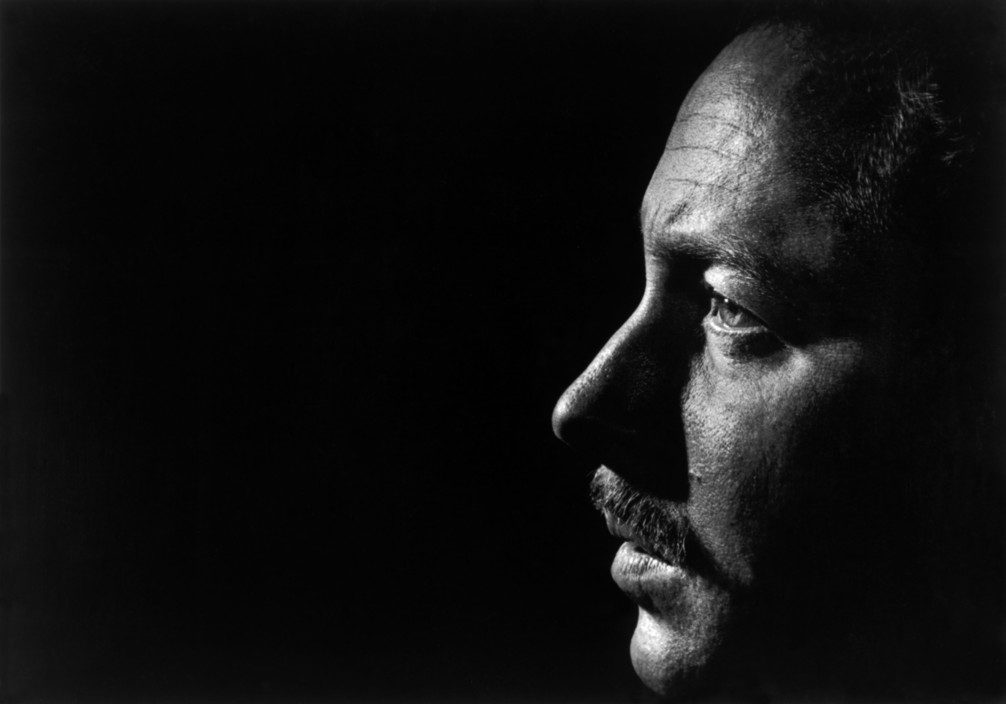
The result is a moody photograph with a high degree of contrast between light and dark. A similarly dramatic effect can be achieved by feathering your lighting to light the face more broadly without allowing light to illuminate the background.
Don’t be afraid to experiment with low-key portraits. These effects can be achieved using natural light or flash. The trick is to direct the light on the subject without it falling on the background. This can be achieved by using light modifiers of flags to ensure the light doesn’t spill onto the background. Try hanging a piece of black velvet behind the subject if you don’t have a black background to use.

High-key portraits
If low-key portraits are effective in creative photography because of their reliance on contrast, then it stands to reason that the opposite must also be true.
In this photograph, it can clearly be seen that the background is overexposed (typically by as much as four stops) and that there is strong lighting from the left of the image.
The effect is that the subjects face and back are inseparable from the background. The eye is left to fill in the blank space and the drama is introduced by the hard shadows on the subject to the right of the image.
Black and White Street Photography
People, places, and things are all grist to the photographers mill and nothing brings all three together better than street photography. This offers us limitless opportunities for create black and white photography.
In my opinion few photographers are better exponents of street photography than Vivian Maier.
It is unfortunate that Maier’s work wasn’t discovered until after her death. In this image Maier brings together a wide range of elements to create a truly engaging photograph.
She begins with a great subject, his clothing and shaggy hair and beard contrast sharply with the well dressed people around him.

The well dressed lady on the left of the image is studiously ignoring the subject whilst the gaze of the man leaning against the window on the right helps to focus us on the subject. The blown out sky and the upright posts force our gaze to the subject, and the dark shop canopy leads our eye to where Maier intended it to go.
The tonality throughout the image is muted, allowing our gaze to move slowly around the image, making fresh discoveries as we go. Had this been a colour image there would have been a lot of competition for our eye and the subject would have lost his impact.
Whilst discussing Street Photography, I would urge photographers to act in an ethical way, especially when photographing people who are down on their luck. Please ask for permission to take their photograph and move on if they refuse.
Post-processing black and white photography
I find it a little strange when photographers claim that they do not post-process their images or that everything should be done in-camera.
A RAW image file is the equivalent of a digital negative that needs to be developed. RAW images tend to be “flat” and I think this is particularly true of black and white images.
I do appreciate that not everyone is competent in computer skills, and that programs like Adobe Lightroom and Photoshop have a steep learning curve. However, there are numerous free tutorials available on YouTube and elsewhere.
Even after 20 years using Photoshop I still learn new techniques from creators on sites like Phlearn and Piximperfect. Likewise, there are plenty of YouTube creators who freely share their digital photography tips.
When post-processing black and white photography the easiest method is perhaps to use presets in Adobe Camera Raw or Adobe Lightroom. These both use the same “engine” and the functionality in editing terms is very similar. Adobe even provides a range of presets built into the applications.
I am also a fan of Silver Efex Pro, and I am still using the free version provided by Google many years ago. The entire Nik collection is now provided by DXO and it is incredibly easy to use, either as a standalone or as a Photoshop plugin. You can easily apply different effects to your black and white photography with a single click. They offer a free trial so try it out and discover just how easy to is to use.
Conclusion
I hope you have enjoyed reading the tips and techniques and they inspire you to get out your camera and try to create some stunning black and white photography yourself. Why not sign up to my mailing list. I won’t spam your inbox, I will just share photography articles and resources with you on an occasional basis.
