I am often asked how to develop a coherent and creative photo editing style? Follow these tips and you will be editing like a professional in no time.
Why is a photo editing style important?
Whether you make your living from photography, or you an amateur shooting for fun, we all share one ambition. Every photographer wants to make the best image they can when they click the shutter button.
We may spend time scouting locations, chasing the light, planning poses for our subject, or liaising with an art director to plan what the final images will look like. All of these things are essential for professional photographers, but may be neglected by a beginner or inexperienced photographer.
In the commercial photography world developing a personal style is important. A successful photographer usually has a style that will allow others to identify their work at a glance. It is this skill that brings photographers repeat work and the opportunity to win commissions.
In the modern world, we all have a camera in our pocket, and there are literally hundreds of apps that allow us to edit our images and share them to social media without ever leaving our smart device. Digital photography has gifted us endless opportunities to create image styles that were simply unthinkable just a few years ago.
The majority of digital photographers take images in Camera RAW format and like any photographic medium, it is important to “develop” those images to show them at their best.
We still find an occasional dinosaur who believes that photographs are only valid if the final image is straight out of the camera (SOOC). This neglects the opportunities that the digital world provides. I hope this article will dispel some myths and set you on your way to developing your own creative photo editing style.
Do you need a photo editing style?

Do you need a photo editing style? Well, I guess that there are plenty of hobby photographers who have little interest in learning to edit their images much less developing a coherent editing style.
Others prefer to edit their photos on an image-by-image basis. I don’t actually have a problem with that approach when someone is new to editing. It’s actually an essential step to take when you are learning to edit your photographs. Trying out lots of different things is a great way to learn different techniques and to allow your personal style to develop organically.
However, professional photographers do tend to have their own personal style, and that develops from their artistic vision. It takes time and experimentation to develop a style but it’s time well invested.
Thinking about style can help to improve your photography too!
Editing software; a word of warning!
It would be fair to say that photo editing software has made it easy for unscrupulous photo editors to create fake images. Indeed, the winner of a Nikon photography contest was found to have faked the image.
In recent years, photo editing software, especially the use of artificial intelligence, has made it much easier to alter every aspect of a photograph. Features and body shapes are easily changed, and it is easy to add or remove elements from any image.
Many advertisers have taken a stand against images that are processed in ways that portray a false image of “perfection.” When you are editing photos you should act in an ethical manner and be open about your editing process.
What is a photography editing style?
Finding an editing style sounds like a complicated process but in reality it isn’t that difficult once you have an understanding of the concept.
An editing style is simply a step-by-step process that you apply to a set of images. This process could be something that you apply to every image you edit, or perhaps just to every image in a single photoshoot.
This means that each image has a similar look and feel. It is perfectly normal to develop a range of styles that can be adapted to fit the circumstances of a commission.
To illustrate the importance of an editing style look at the important photography competitions. Many of these invite entries for a series of images, usually around 10 images. Those images are likely to be part of a photography project that has been shot at different times and in different locations.
If the series of images is to form a coherent whole then a photo editing style that is appropriate for the series should be used. For example, it would make no sense to add warm tones to a series of images of Icelandic landscapes shot in winter.
A series of images looking at issues around poverty is likely to benefit from a more gritty edit than from a soft and dreamy style.
How to find your photo editing style
It is not difficult to find a photo editing style that suits the way you work. What it does take is an open mind, a bit of effort, and a lot of time.
Of course, before you can begin to experiment, you will need some software. My advice is to begin with software that is available for free.
Microsoft and Apple both package photo editing apps with their operating systems. To be fair both offerings are very limited in features but it is definitely worth playing around with them to see what you can achieve.
App stores are full of photo editing apps that are very inexpensive and contain more features, usually by way of filters or presets, that can substantially alter your image.
Spend some time with them, adding different editing styles to your photos, until you begin to understand what you like and what you don’t.
Adobe Lightroom
For me, Adobe Lightroom is the gold standard for creating photo editing styles. Capture One has a growing fanbase amongst professional photographers but its subscription is much more expensive than Adobe’s photographers subscription which includes Lightroom, Photoshop, and a host of cloud based services.
Lightroom ships with a collection of presets and profiles that can transform your image with a single click. My advice is to try out the presets to see how they look. Every preset is adjustable, and if you don’t like the end effect you can simply reset the image with a single click.
Take some time to play around with all of the sliders to see how they change your image. If you right-click an image in the Lightroom film strip you can even create a virtual copy. This means you can apply as many different looks to an image as you wish. Comparing the different versions gives you an easy way to determine your preference.
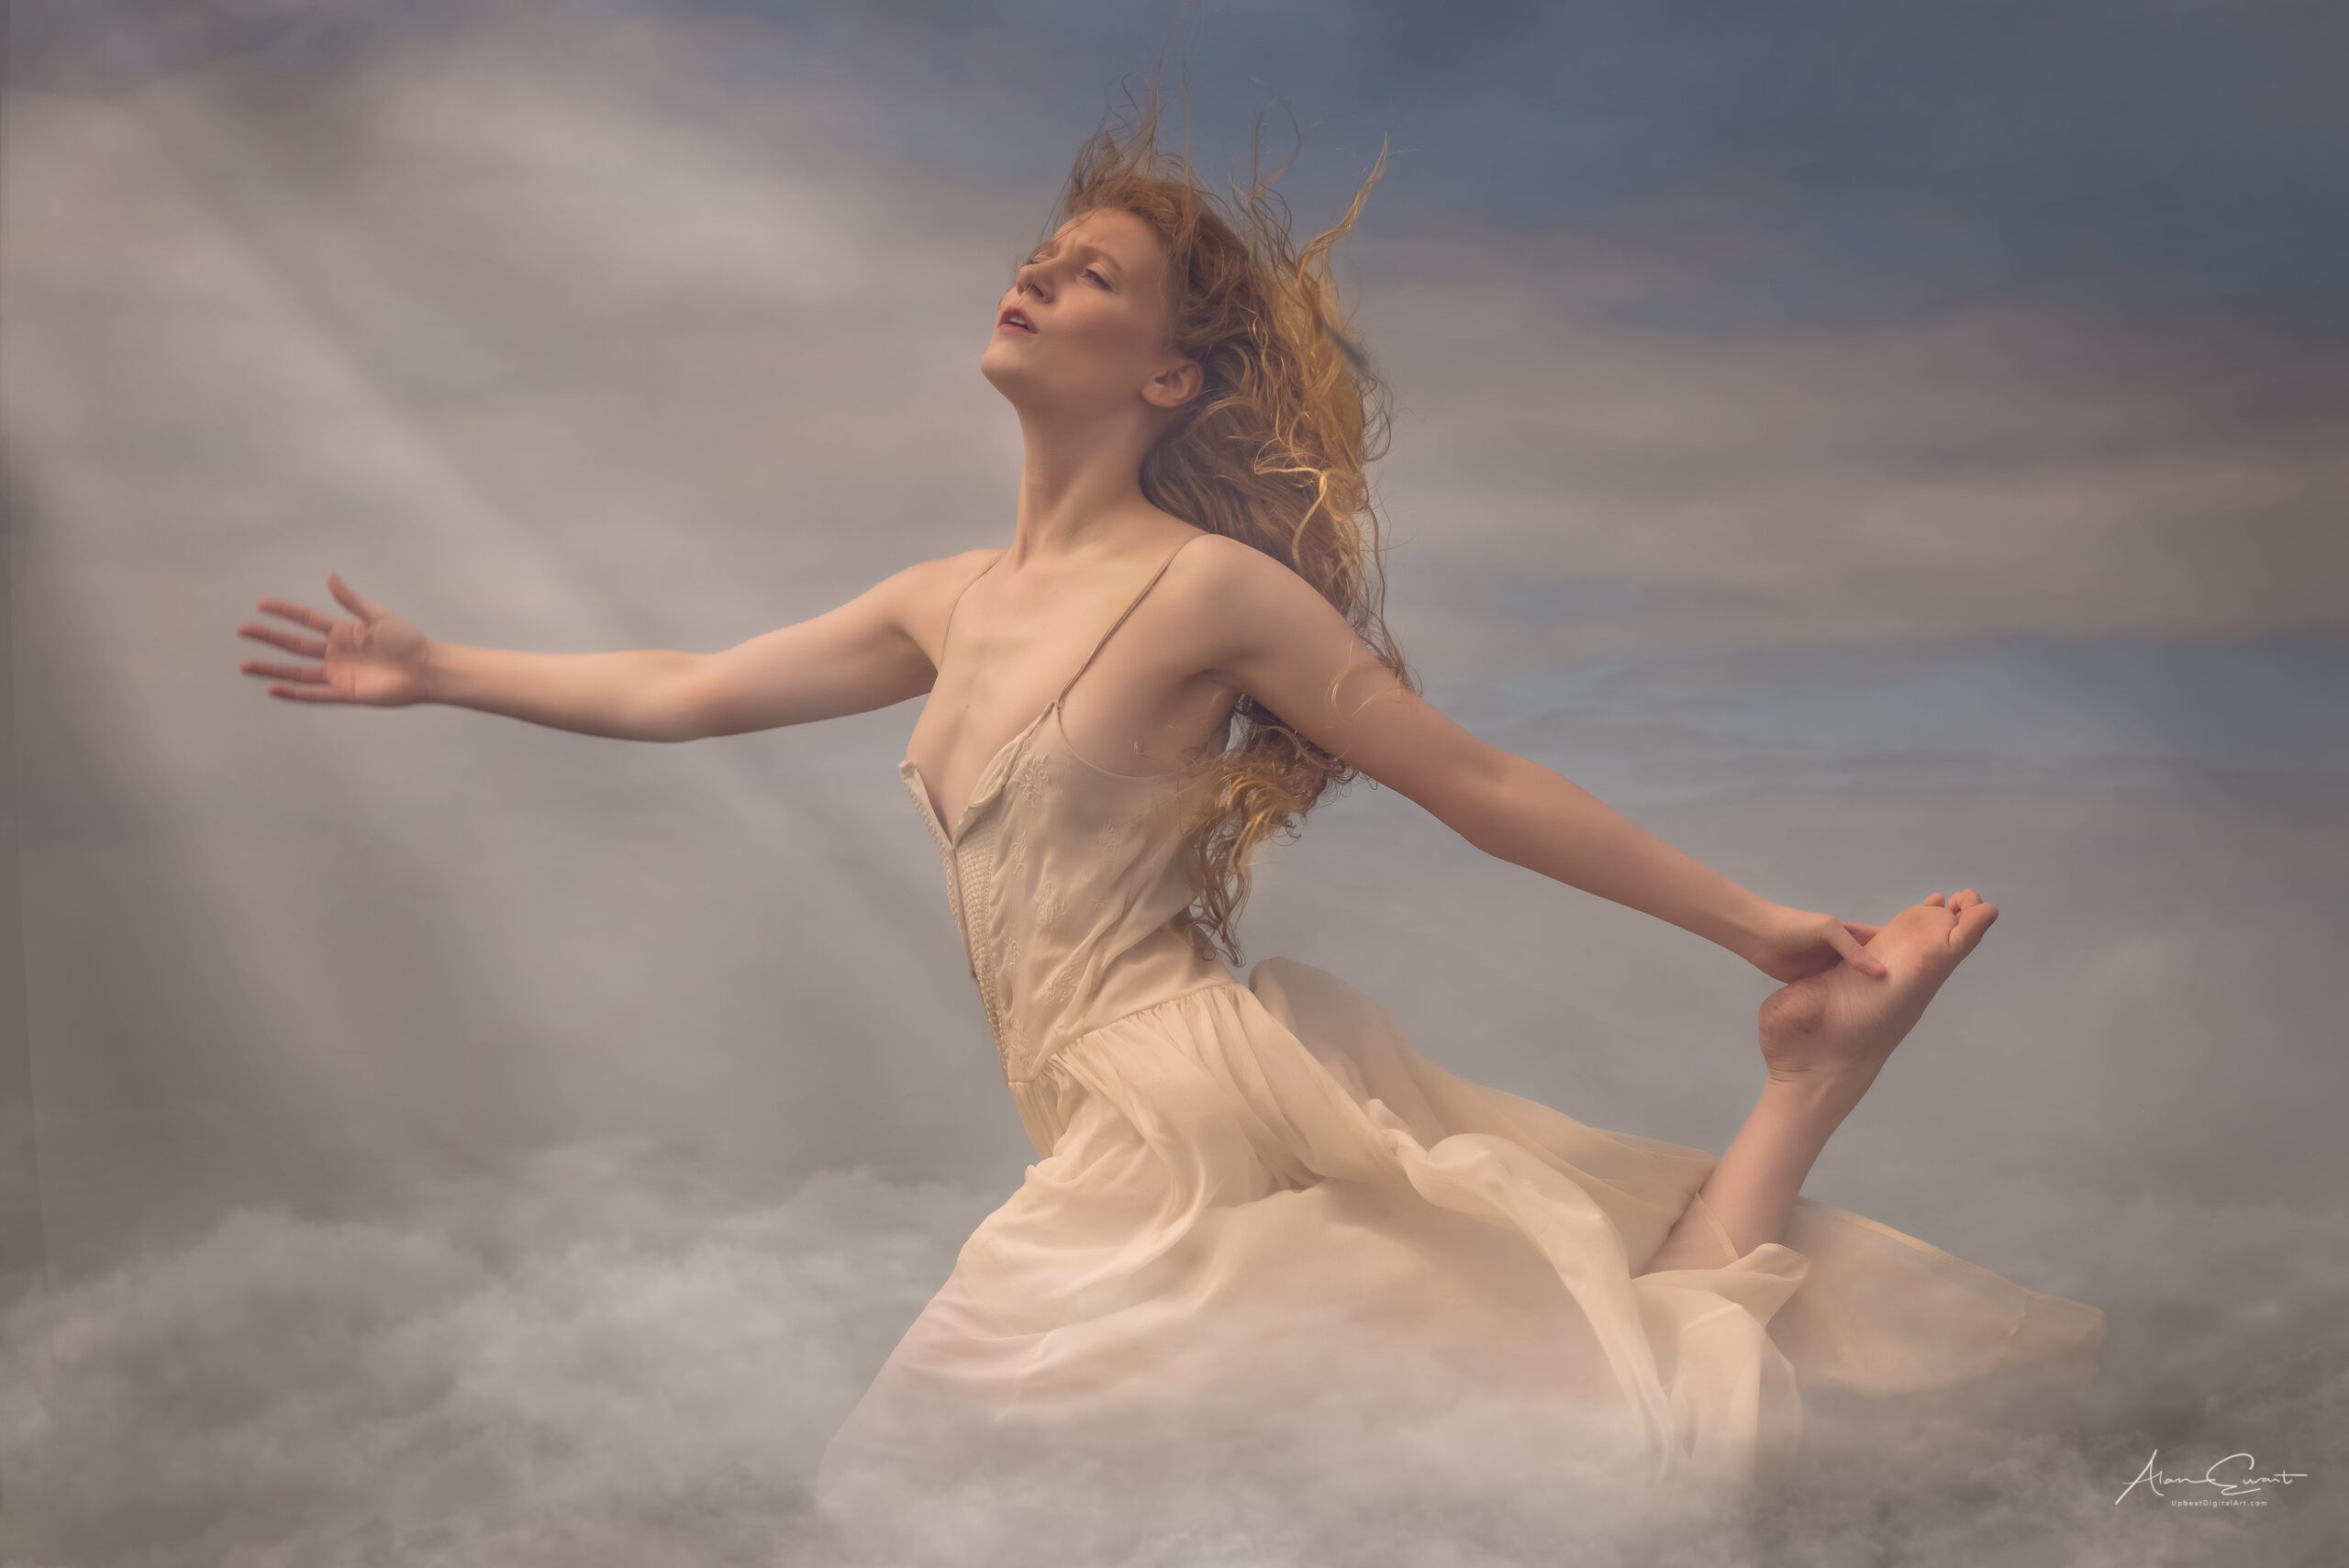
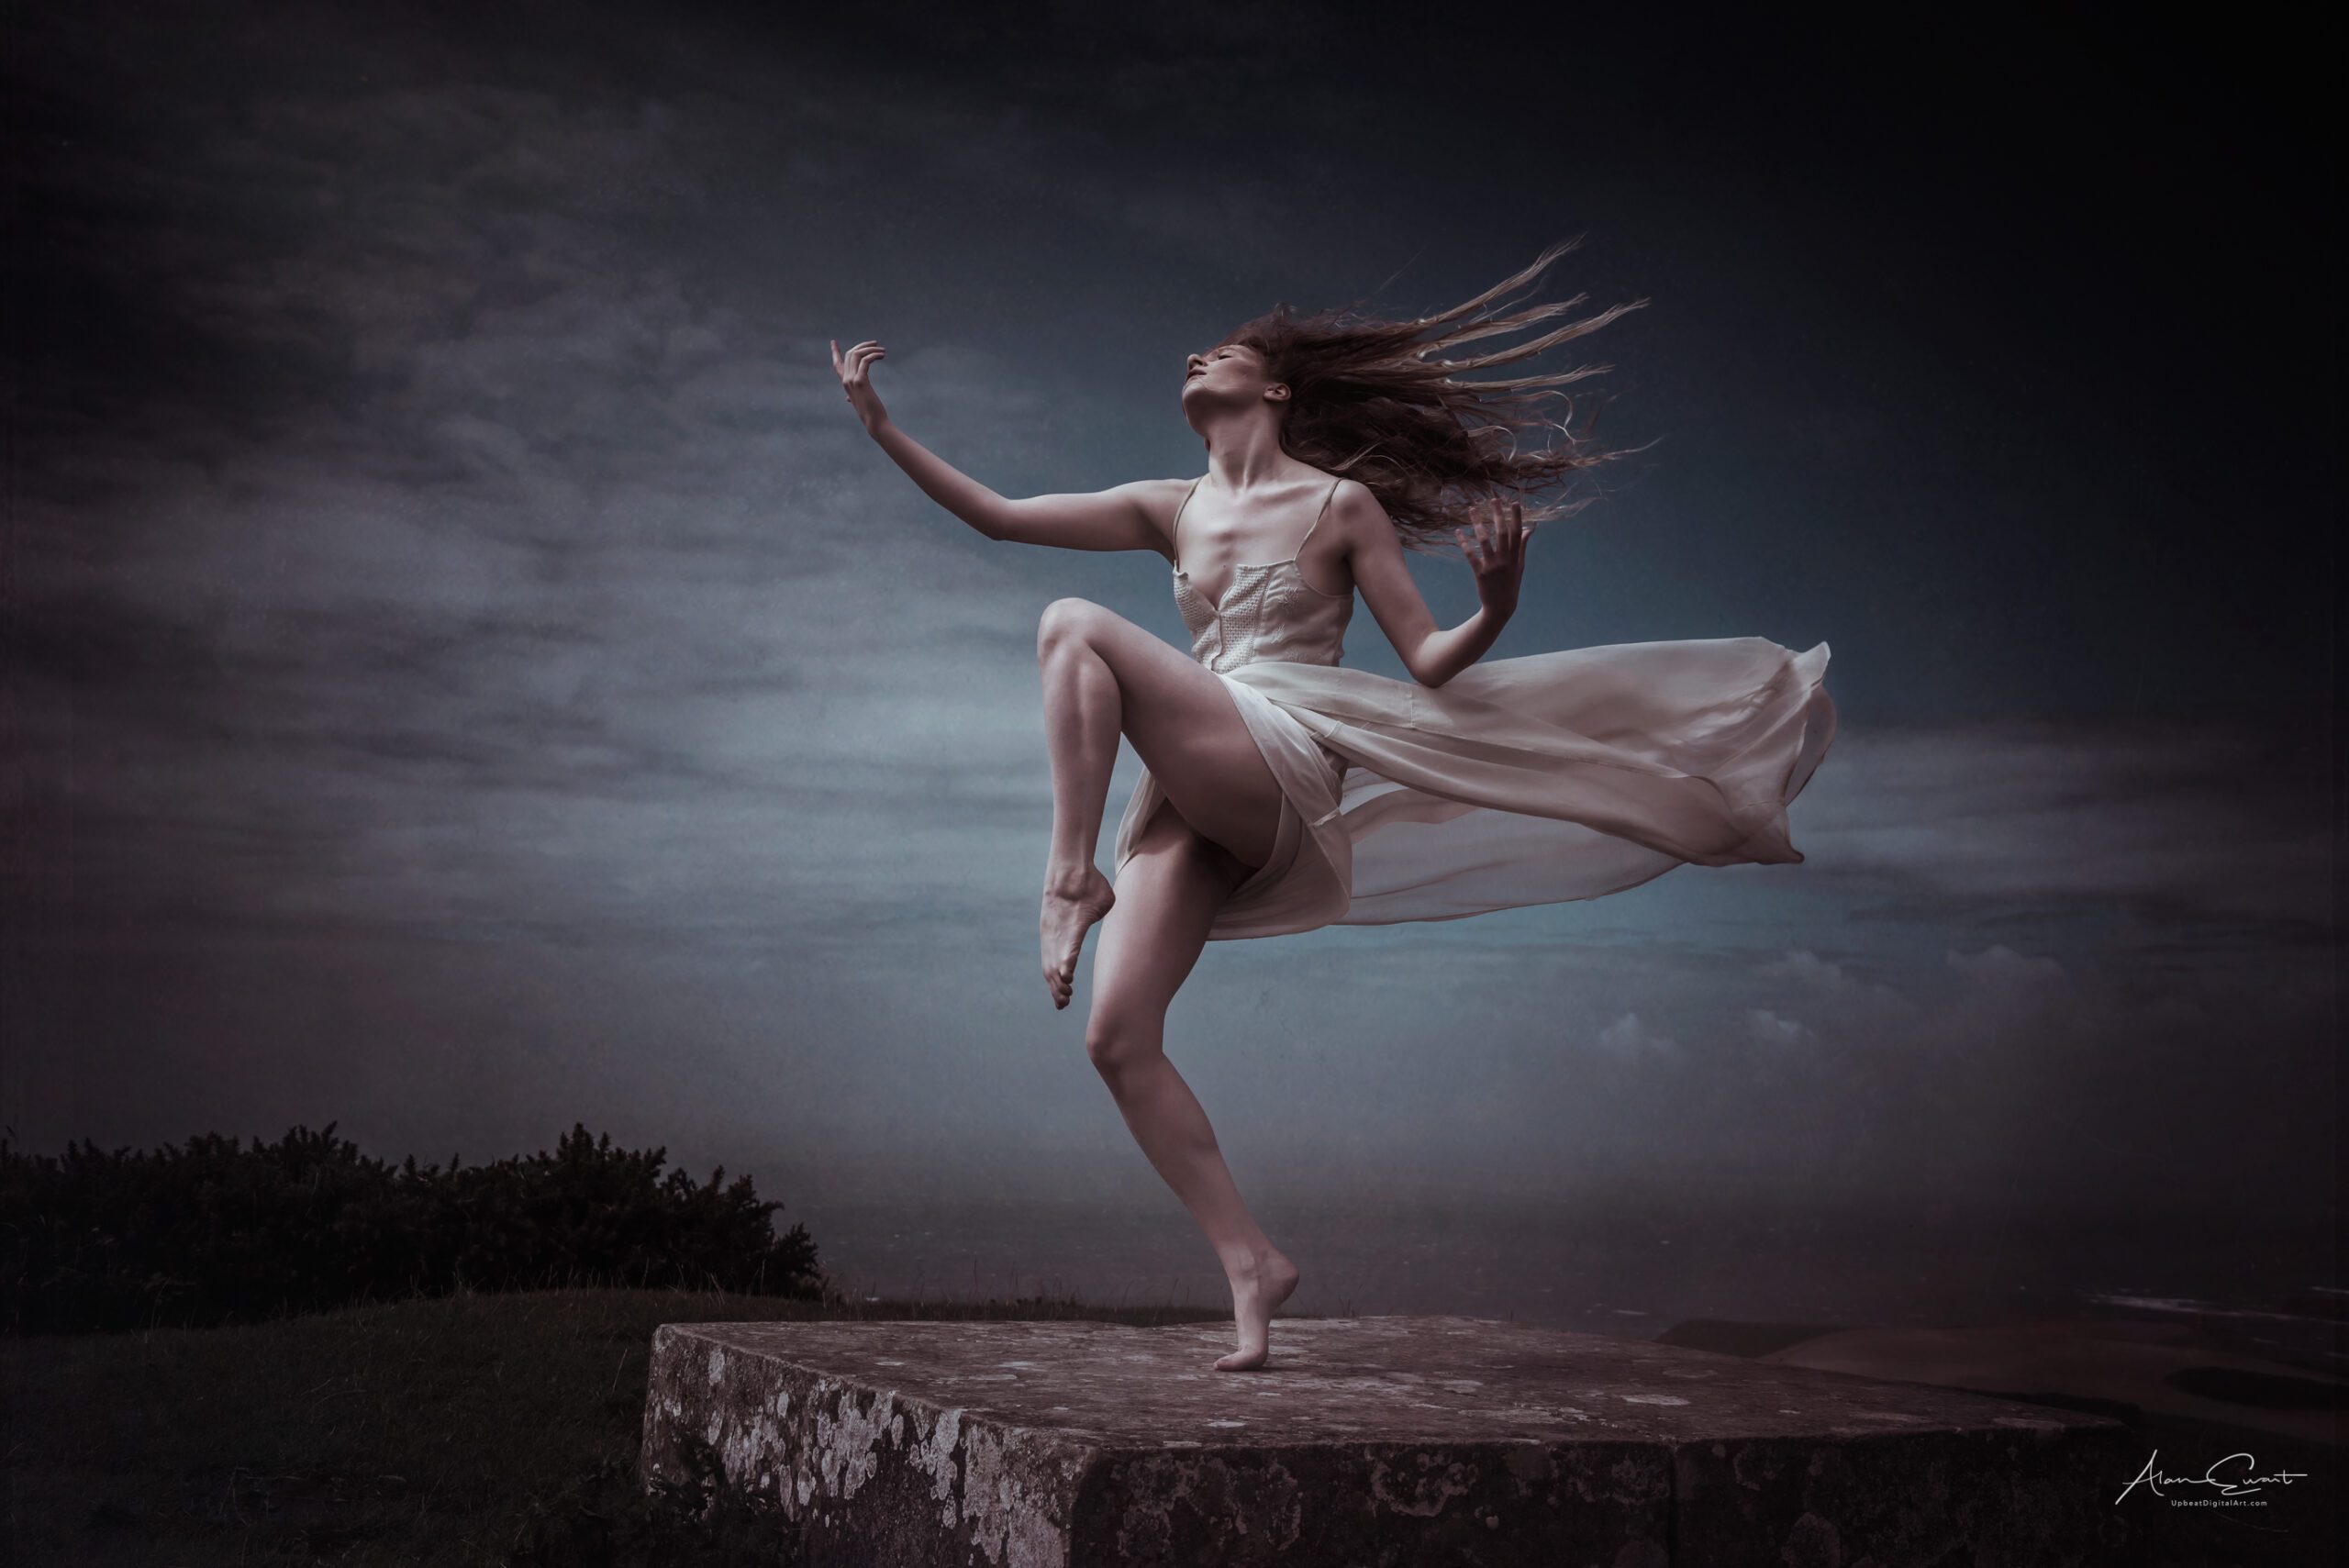
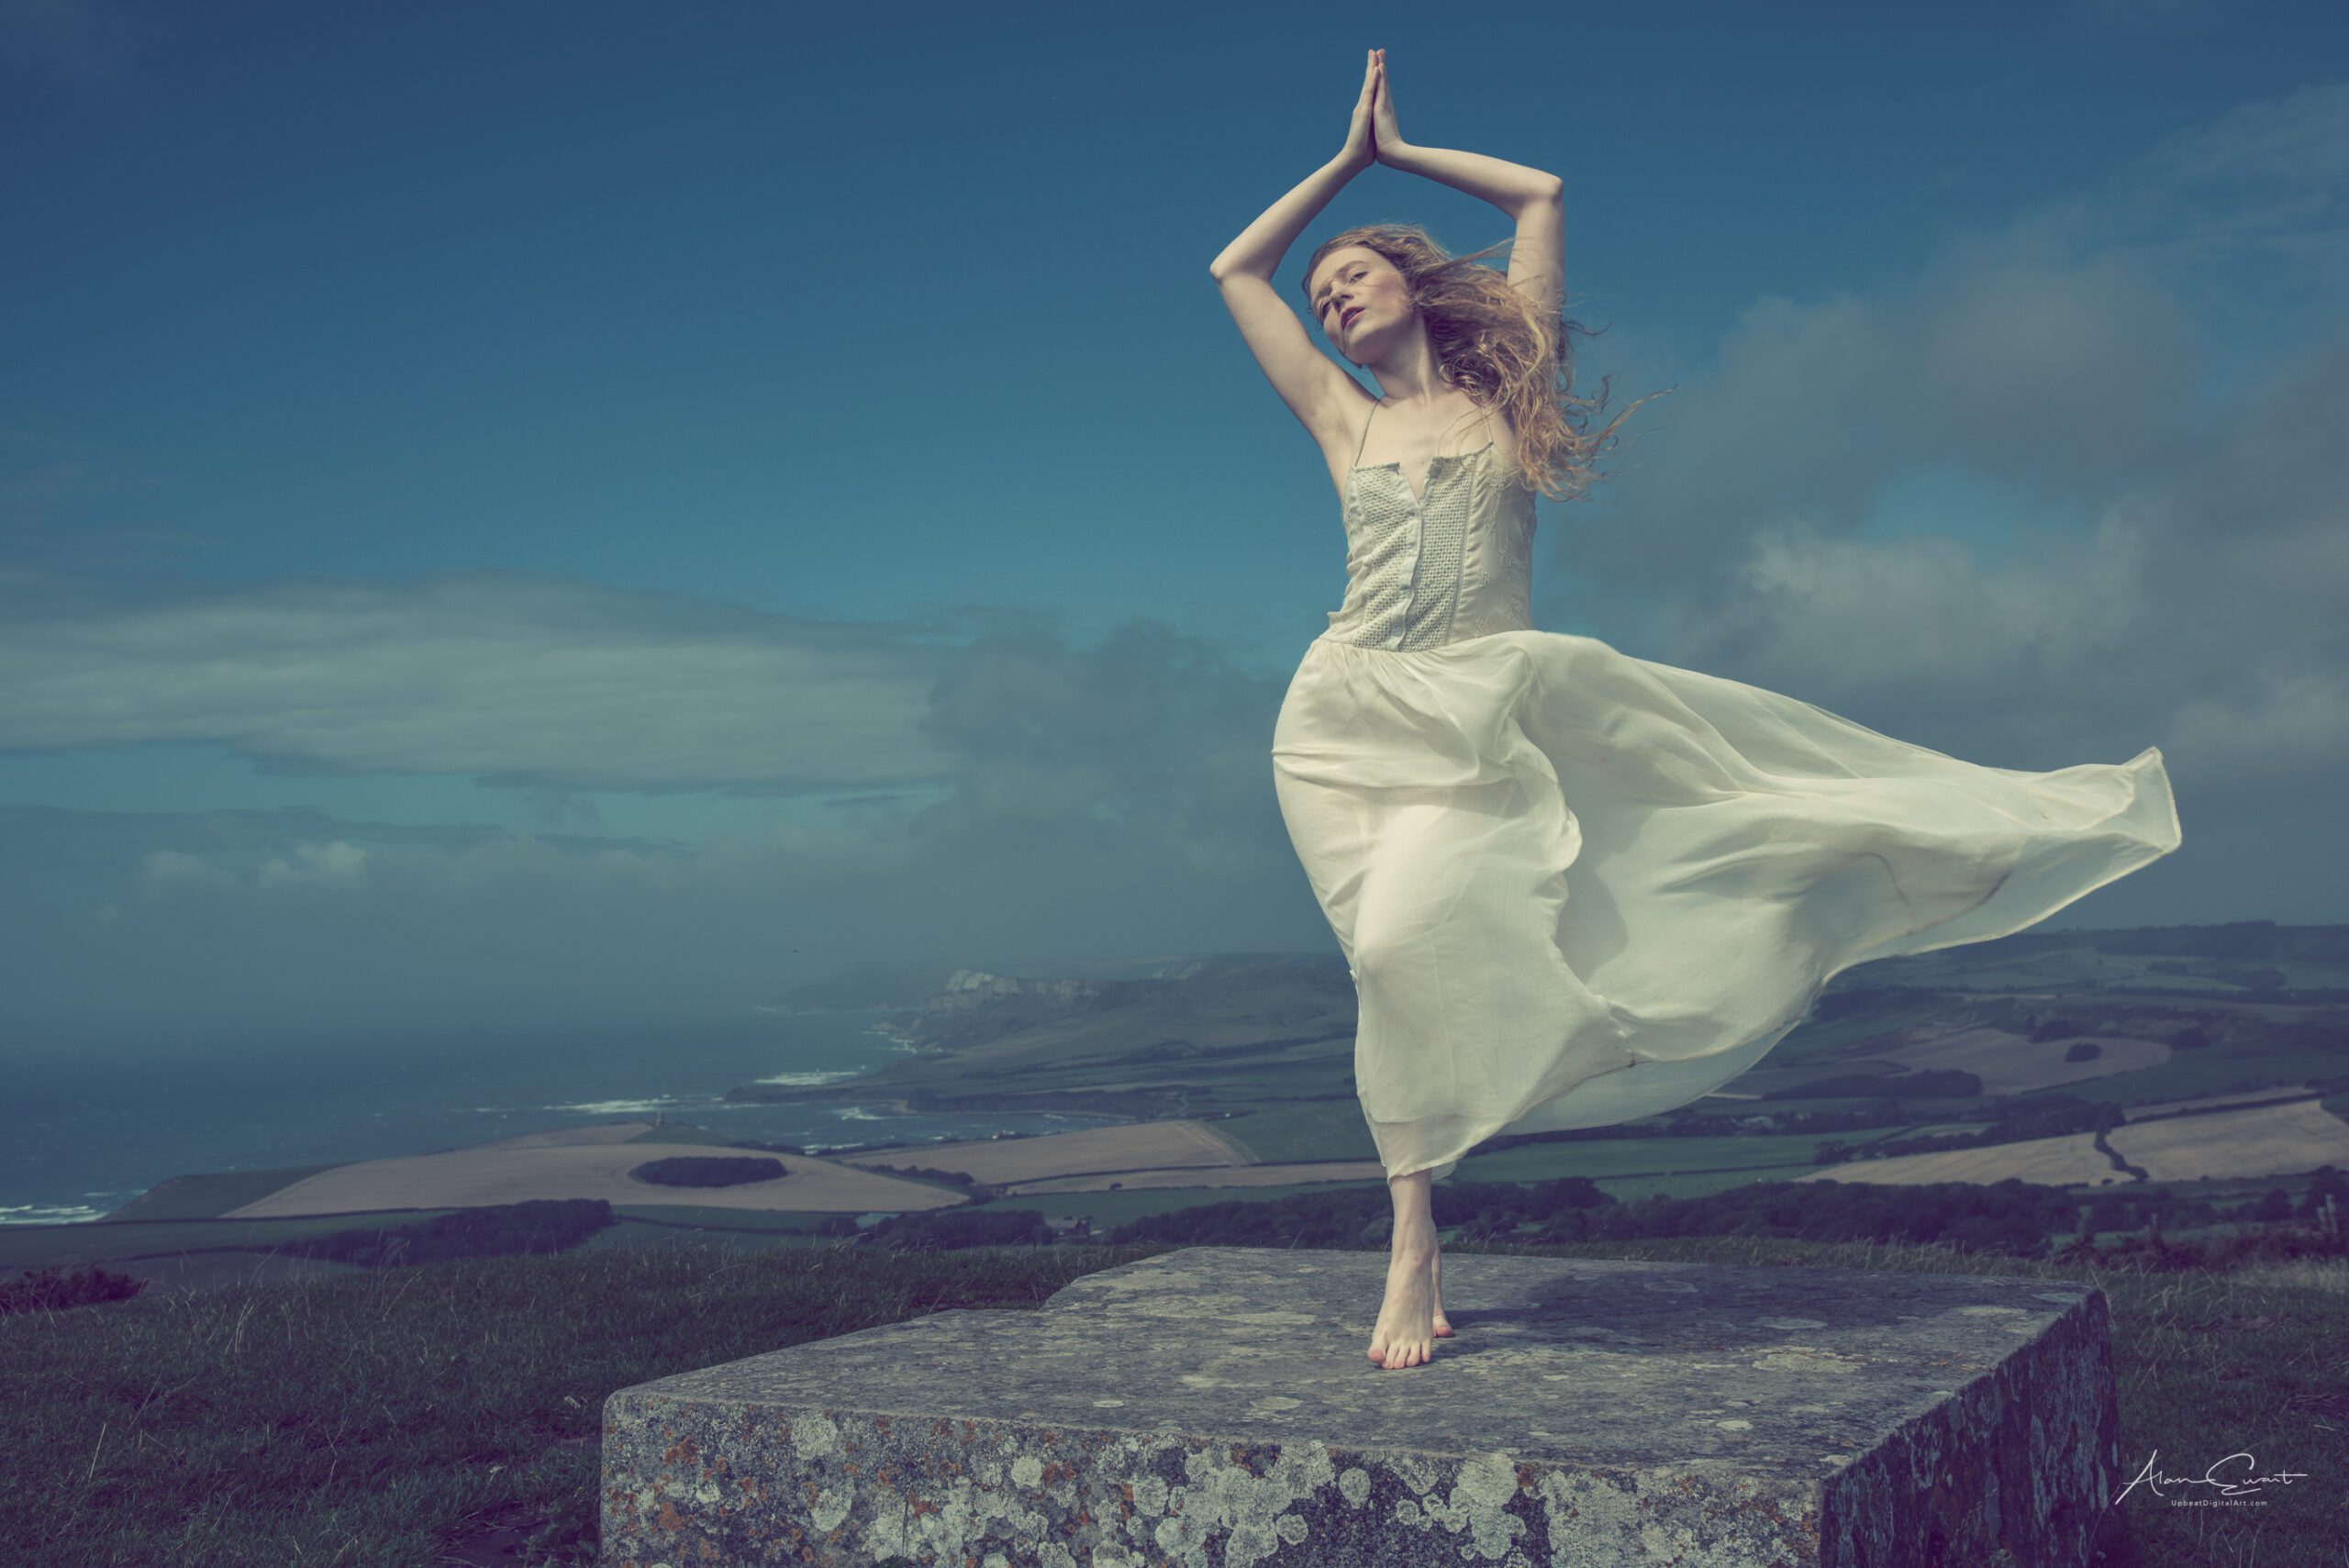
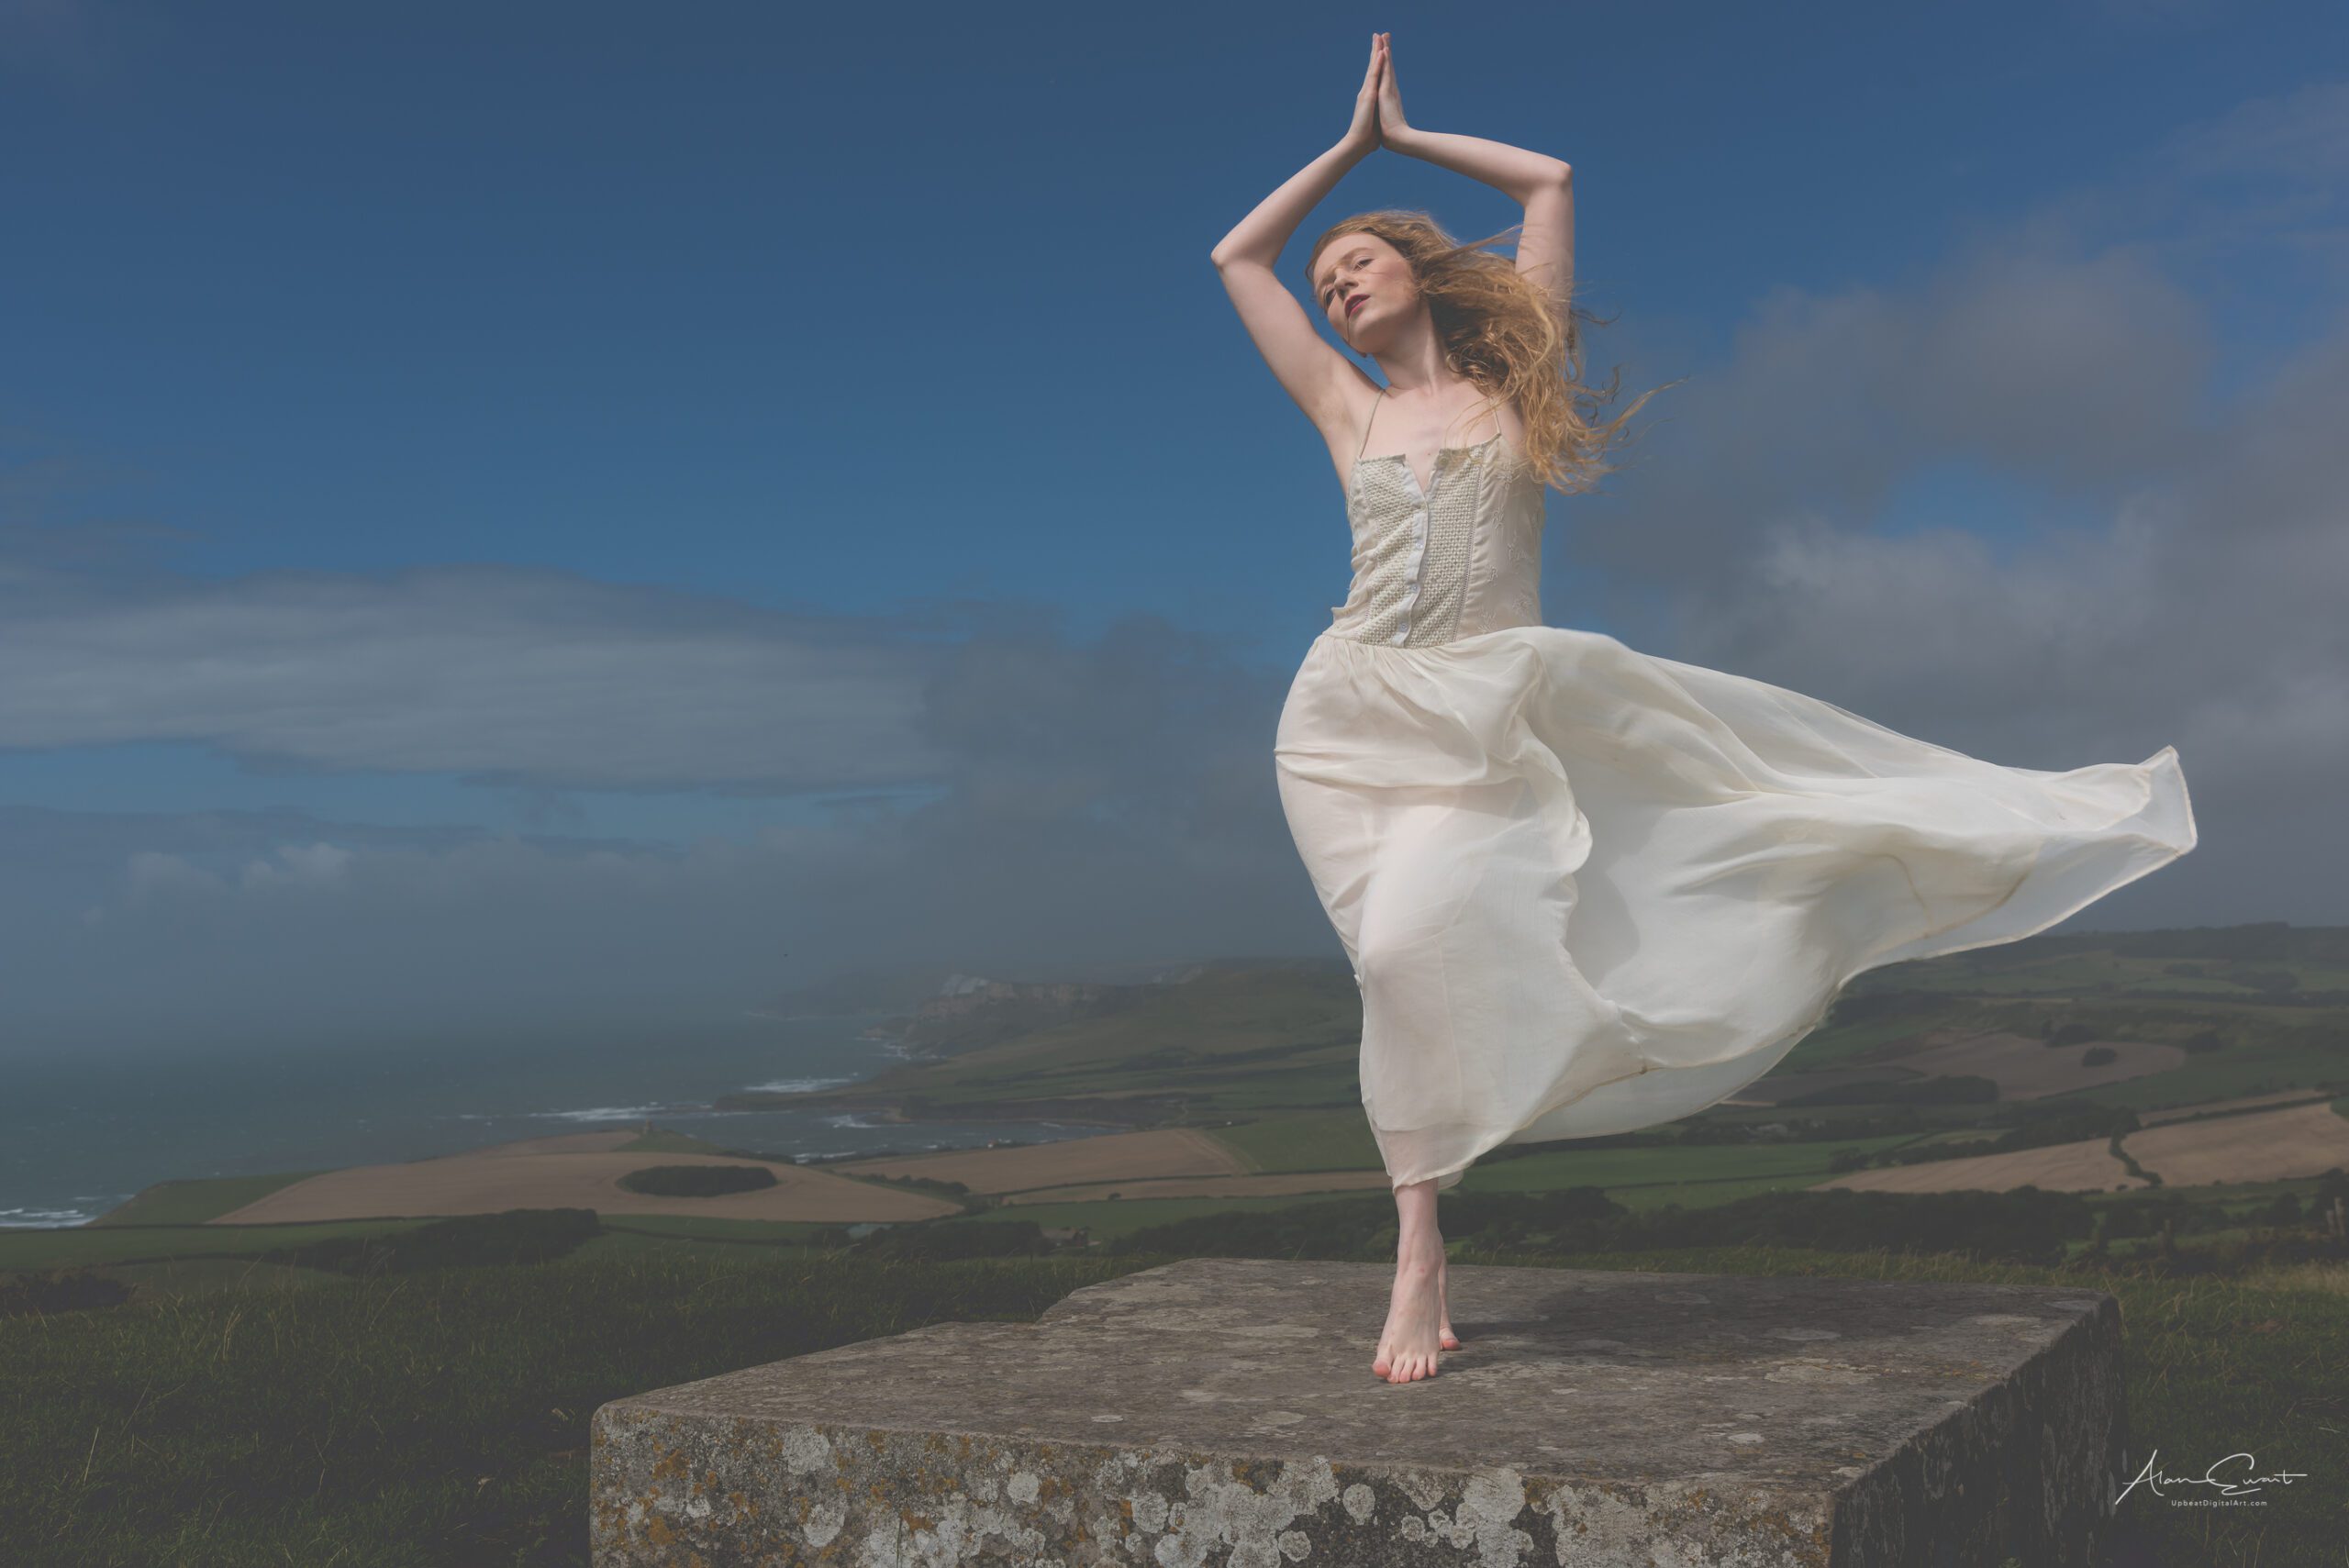
As an example, the image above was processed with five different looks in Lightroom in under two minutes.
The real beauty of Lightroom is that it is completely non-destructive, you can always reset your image to its original state.
When you begin working in Lightroom you should begin with the “basic” panel in the develop module. Play around with the sliders to adjust the exposure, contrast, highlights, shadows and white balance. You can create a host of different styles just with these five sliders.
If you search the internet for anything photography editing related you will doubtless find yourself bombarded by advertisements for Lightroom presets the next time you use social media. The adverts promise that you can edit every photograph with a single click.
This is true to an extent. However, you should bear in mind that these presets have only been tested on a set number of images. This means that they might look great on one photo and awful on others. My advice is to buy a preset set or two and use them as a basis for creating your own presets. This is very easy to do, though it is beyond the scope of this article.
It’s also fair to say that the quality of presets for sale varies considerably. I have enjoyed using the presets created by Greater Than Gatsby and Sleeklens.
Photography editing styles to try
When you are searching for your unique photo editing style it helps to have some options to try out. Here is a roundup of a few editing techniques that you could try.
Clean edit
A clean edit is the most straightforward style of edit. It really just addresses the basics like exposure, clarity, sharpness, and colour temperature. For more advanced image editors you may choose to remove any distractions.
A clean edit may be straightforward, but this doesn’t mean that this style should be ignored. Clean editing is useful for images that you want to look as if they have not been edited at all. There should be room for this technique in every photographers editing workflow.
Clean editing gives your image a timeless quality and as a result it is not something that is ever likely to go out of fashion. On a personal level I will often do a clean edit before sending a client a proof copy of an image. I am also likely to use this as a basis for more creative editing,
High dynamic range editing
Speaking of things that go out of fashion, High Dynamic Range (HDR) photography was very popular when I began studying photography. It has certainly declined in popularity, probably because so many photographers did it so badly and made their images look fake.
However, there is still a time and place for HDR photography and editing. The main issue with HDR is that it can be a difficult technique to master.
I would guess that at one time or another, every photographer has photographed a sunset. You expose for the sky and your ground is really under-exposed with no detail visible. Alternatively you expose for the ground and the sky is overexposed and blown out, all of those beautiful sunset colours are lost.
This can be corrected by using a Neutral Density filter on your camera. This can achieve a much better balance by darkening the sky through the filter so that both sky and ground are close to properly exposed.
HDR offers a different way of solving the problem. You “bracket” a number of exposures, usually three or five. One image is properly exposed then one or two images are underexposed, typically by one stop for each additional image. One or two images are then overexposed by a stop and all five frames are combined in software to create an HDR image.
Put simply, the underexposed images are used for the sky whilst the over exposed are used for the ground. The technique results in all of the detail being visible in both light and dark areas of the image.
Software like Lightroom can combine all of the frames into a single image at the click of a button. There are plenty of apps available that focus purely on creating HDR images. The one drawback with this technique is that you really need to mount your camera on a tripod when you capture your bracketed images, otherwise you may see artefacts or ghosting when you combine the images.
All that said, HDR can be a useful photo editing style and it is possible to emulate the technique in Lightroom from a single image. In my opinion HDR editing should be avoided by portrait photographers as it is not complimentary on skin tones.
Vintage photo editing styles
Even at the end of 2022 vintage photo editing styles remain en vogue. Vintage styles evoke a feeling of nostalgia taking us back to the pre-digital photography days.
Vintage edits often seek to emulate the film processing styles that were popular in the 1970s or 80s.
As is the case in the image on the left, vintage edits may have a slightly matte finish, they may contain “grain,” and the color can look a little washed out. It’s even possible to make your image look like an old polaroid photo.
I developed a vintage photo editing style for my Regarding Family project. You can see how every image in the series has a similar feel.
Losing the colour
When it comes to classic photo editing styles there is nothing more classic than a black and white image. Don’t be fooled though, black and white editing is incredibly versatile, and perhaps bizarrely a little colour can add a huge amount to a black and white image.
It is common to see black and white images with a blue tone added to the image. This emulates the cyanotype processing that has been around since the early days of film processing. You can also try adding a little bit of warmth to the image to create a sepia toning.
Try adding some warmth to the highlights and some blue to the shadows to create “split toning” or a touch of purple or red to emulate selenium toning.
All of these editing styles replicate the effect caused by various chemicals when developing and printing film in the dark room.
The matte effect editing style
The matte effect image continues to be a popular editing style. This effect softens the contrast of light and shadow in images. This reduces the sharpness and glare, brings out textures and allows editors to adjust the mood of the image.
The matte effect is popular in modern photography because it is widely used in movies and on TV to create a mood or evoke an emotion.
Artistic editing
I am a huge fan of artistic editing, and it is popular with my clients. To be fair, this style of editing goes beyond the use of programs like Lightroom and it is certainly something that needs to be learned and practiced.
For example, the image below was created by using parts of around 30 different photographs to create a scene that doesn’t exist in reality. The image is built up using lots of layers, colour toning, textures etc in Photoshop.
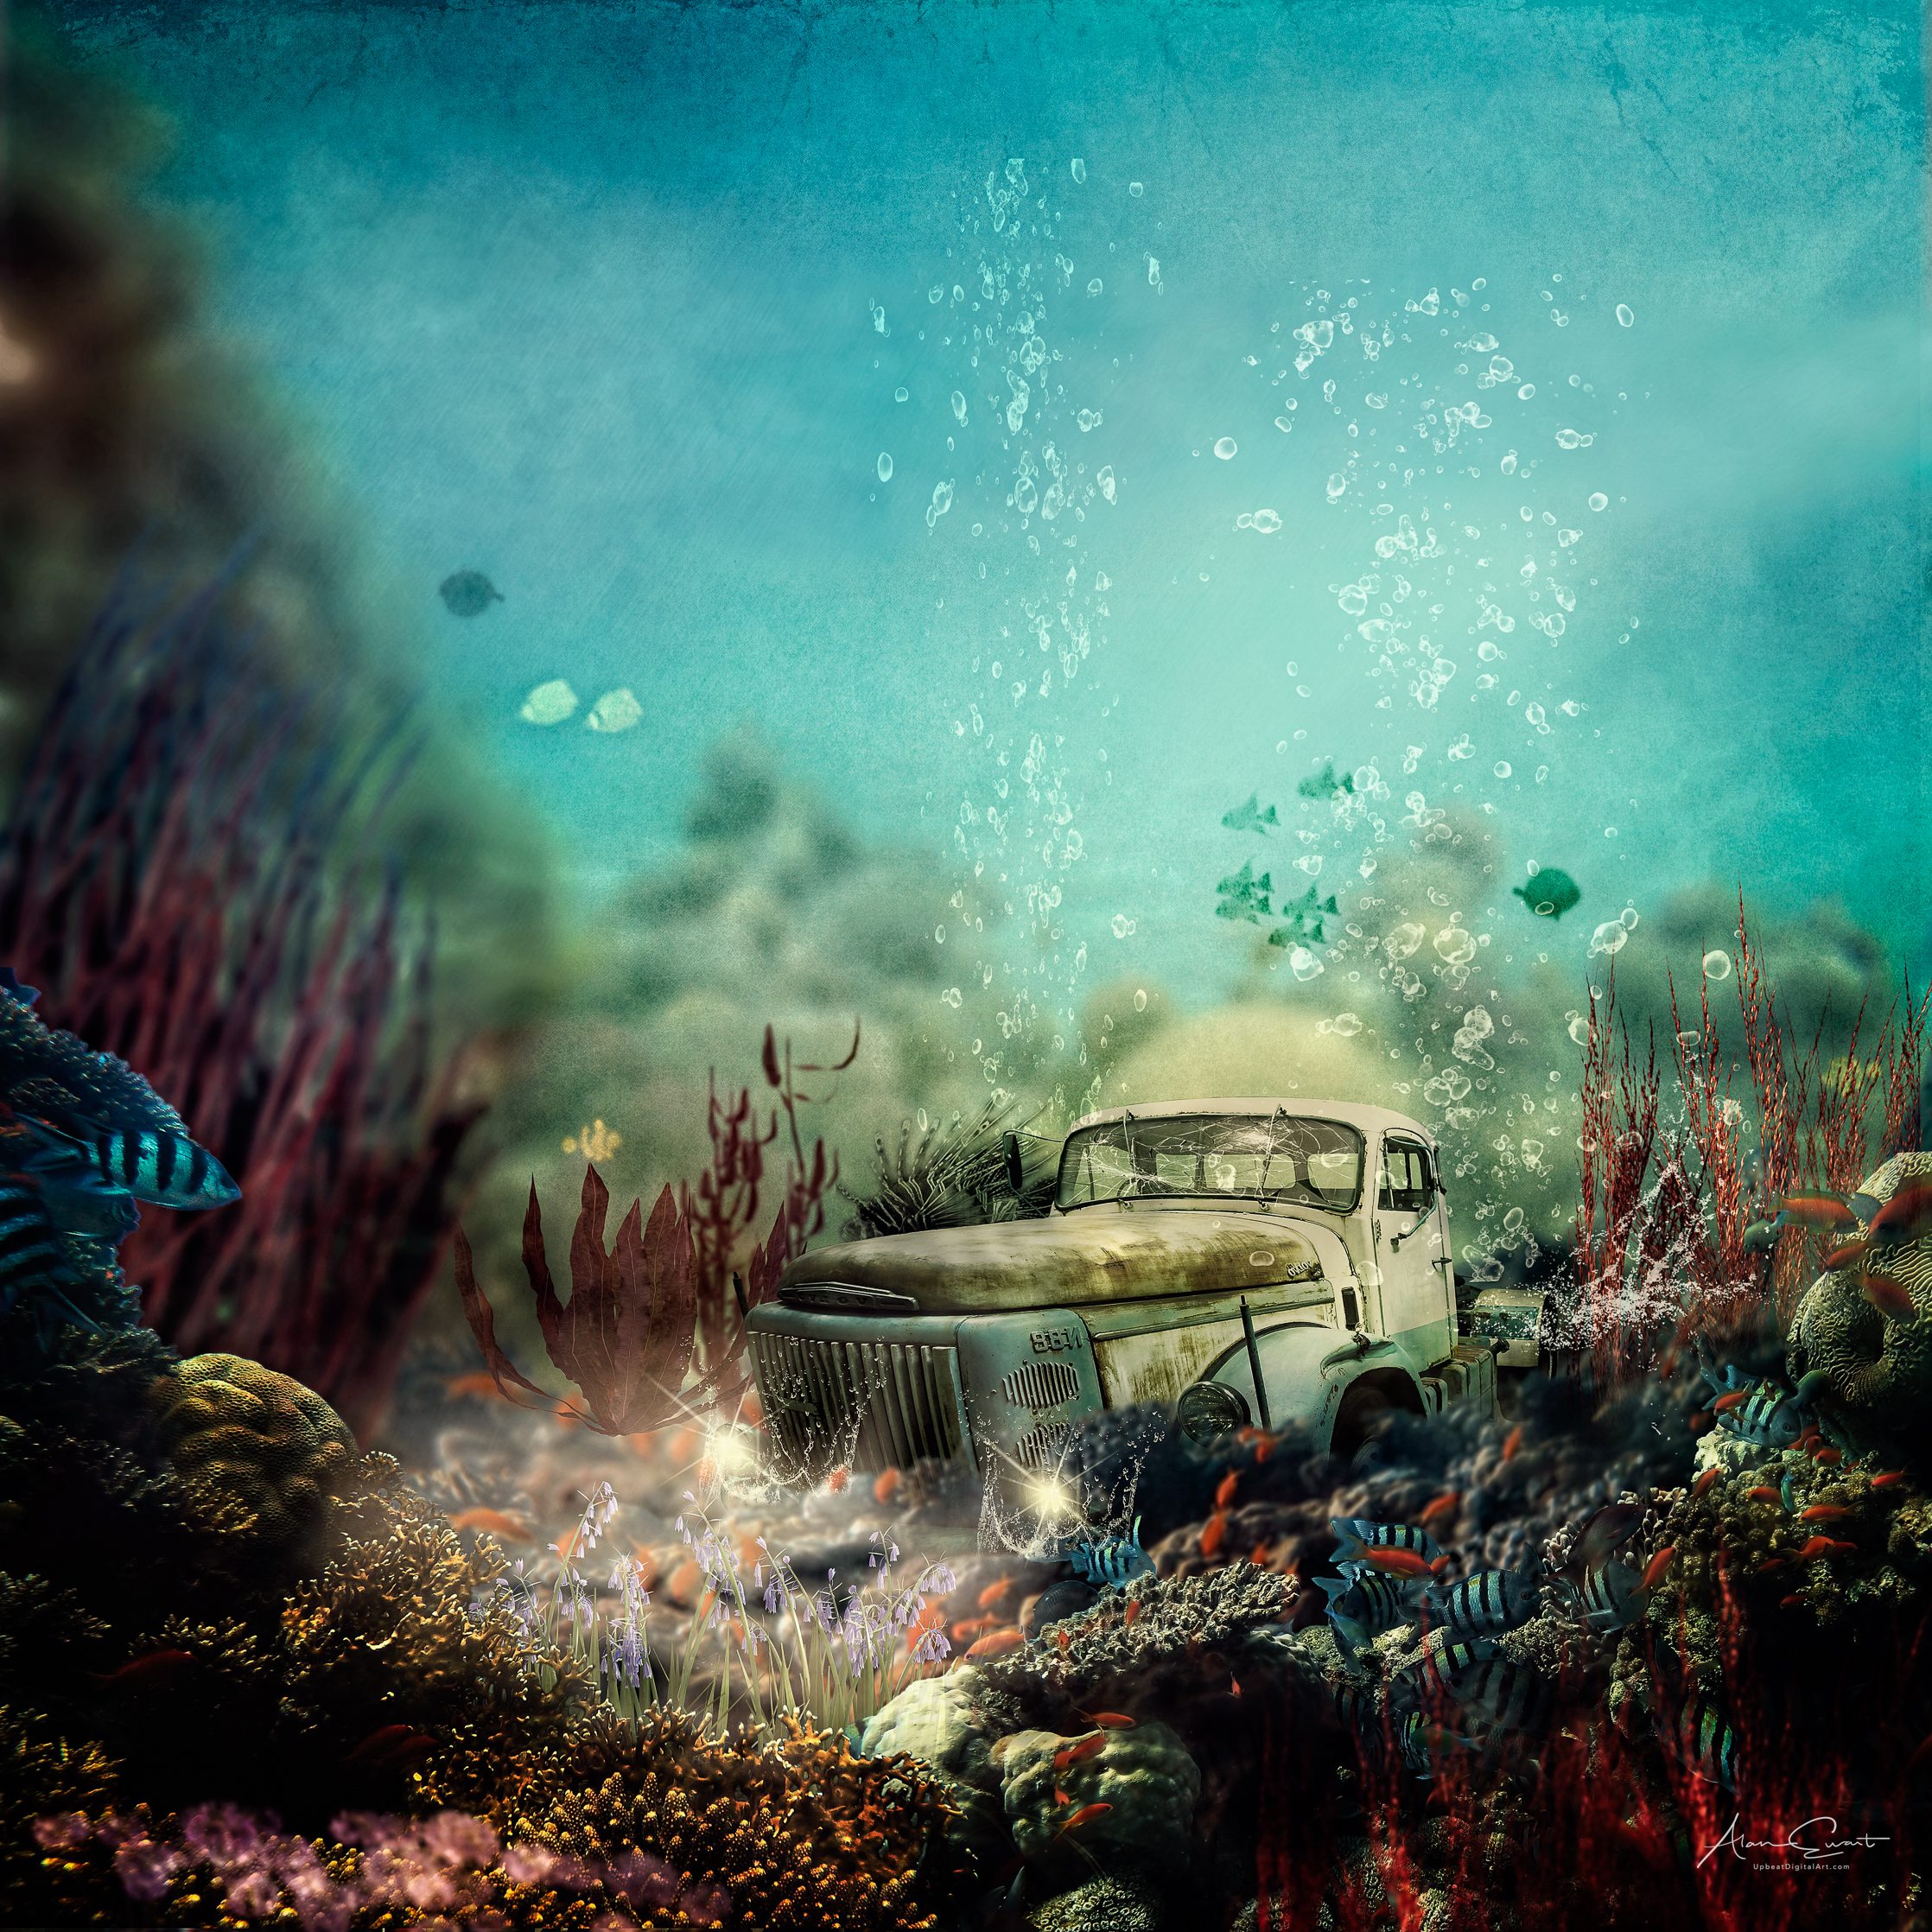
This photo editing style is limited only by your imagination.
How to develop a photo editing style
In this article, I have explained how to achieve a range of different photo editing styles. My advice is to try them all out when you begin to develop your style. Once you get a feel for your editing program try mixing and matching the different styles to create something that is unique to you.
All bar two images in this article were created by using presets in Lightroom. As you combine effects it is easy to save all of the changes as a preset that you can use at any time in the future.
When you have a “look” that you like for one image you can easily synchronise your settings across every image in a series. Just click on your reference image, press shift and click on the rest of the images in the series.
When you do this you will see a “synch” button appear at the bottom of the tools panel in Lightroom. Click on this an a window appears, allowing you to select which settings to synch across the series. This allows you to apply the same look to hundreds of images with a couple of clicks.
It is worth noting that all bar the first and last images in this article are from the same shoot and all were edited in a minute or two using Lightroom presets.
The key to developing your own editing style is simply to have fun, experiment, and try out different styles. You will be developing your own style in no time at all.
If you are someone who has little interest in editing your own photos, I do offer a professional editing service. Please feel free to get in touch if I can help.
